Mac App Store Dev
The Mac App Store (MAS) Dev build is only required to test certain features that are exclusive to
the MAS. In general, you should use the main build instructions (using npm run electron) unless
you have a specific reason for needing the MAS build.
Setup
These steps can be quite tricky. If you encounter any difficulties, post in the #team-eng Slack
channel for assistance.
Xcode
-
Install Xcode from the App Store.
-
Login with your AppleID that is a member of the 8bit solutions LLC organization. This can be done from
Xcode > Preferences ... > Accounts -
Ensure you have a personal code signing certificate assigned to Bitwarden Inc by clicking the
Bitwarden Incteam and clickingManage Certificates.... -
If no certificate is listed, click the plus sign (
+) to create one.
Keychain
Verify that your Apple Keychain contains a value for AC_PASSWORD, if not we’ll need to generate
one.
-
Login using your Apple Account on the Apple-ID website.
-
Click on “App-Specific Passwords”

-
And then click on the
+icon next toPasswordsto add a new App-Specific Password.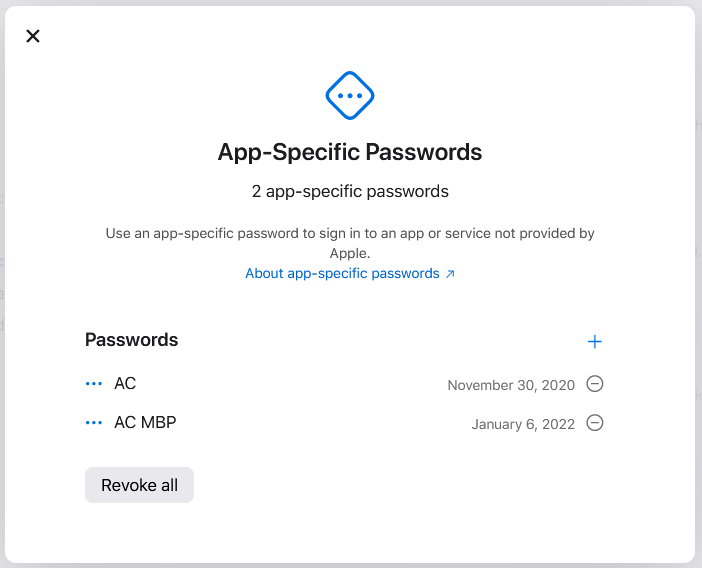
-
Save the new App-specific password using
security add-generic-password -a "<apple_id>" -w "<app_specific_password>" -s "AC_PASSWORD"
Provisioning Profile
-
Retrieve your Mac "Provisioning UDID" by going to "System Information > Hardware" and copying the
Provisioning UDID:row. -
Ask BRE (@bre in slack) to have your
Apple Developmentsigning certificate and device UDID added to the following provisioning profiles:- PM Beta Desktop-App Testing
- PM Beta Desktop-ExtAutofill Testing
- PM Dev Desktop-App Testing
- PM Stable Desktop-App Testing
- PM Stable Desktop-ExtAutofill Testing
-
Once everything is added, download the provisioning profiles from https://developer.apple.com/account/resources/profiles/list.
-
Install each provisioning profile to your device by double-clicking it, which will open a System Settings window. This will allow your machine to trust and execute the apps built with this profile.
-
Copy the provisioning profiles to the locations required for building. They must go in both
clients/apps/desktopand the Xcode provisioning profile directory. Here is an example script demonstrating this:mkdir -p ~/Library/Developer/Xcode/UserData/Provisioning\ Profilescp ~/Downloads/PM_*.provisionprofile clients/apps/desktopfor profile in ~/Downloads/PM_*.provisionprofile; douuid=$(/usr/libexec/PlistBuddy -c "Print :UUID" <(security cms -D -i "$profile"))if [ -z "$uuid" ]; thenecho "Could not read UUID from $profile, skipping" >&2continueficp -v "$profile" ~/Library/Developer/Xcode/UserData/Provisioning\ Profiles/"$uuid".provisionprofiledone
Building
-
Identify the name of your personal development certificate by running:
security find-identity -v | grep 'Apple Development' -
Ensure the CSC_NAME environment variable is set by running export CSC_NAME="", the value should be the output from find-identity without the Apple Development: portion.
-
Run
npm run dist:mac:masdev.infoIf this is your first time running desktop locally, be sure to run
npm cibeforenpm run dist:mac:masdev.
Troubleshooting
If you receive an error stating You do not have permission to open the application "Bitwarden".
ensure the correct provisioning profile is placed in the desktop repository root.
Testing in QA
Per the SDLC, QA verifies changes before they are merged into main. Currently the GitHub CI workflows for building the Mac desktop client do not create a build artifact for the Mac App Store as part of the workflow run. QA can obtain a build through these steps:
- Navigate to the
Build Desktopworkflow under theGitHub Actionstab. - Click the
Run workflowdropbox.- Select the branch in question.
- Ensure "Force distribute to TestFlight" is checked.